

Manga Storyboard Style: Rough Out a Scene Before Final Art
Example preview
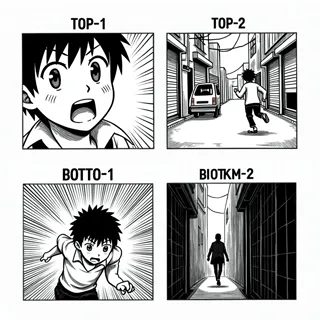
Plan a manga scene with simple black-and-white storyboard frames. Test shot order, panel rhythm, and character placement before spending time on polished rendering.
For a rough visual script rather than a finished page. The source is a concise black-and-white manga-storyboard prompt, leaving camera instructions and the plot for you to define.
When to use this template
- Trying two panel orders for a reveal
- Blocking a conversation before lettering
- Planning an action scene for a later illustration pass
Build your first draft
Write a shot list
List what changes in each frame and choose a shot size. Use short descriptions that identify the important action.
Block the positions
Describe the room, characters, and key object. Keep left-right relationships stable unless a visible transition explains the change.
Mark revisions
Count the frames and read them without dialogue. Add notes and shot numbers outside the artwork, then replace weak beats before polishing.
Try a complete example
The unopened letter
Five black-and-white manga storyboard frames: wide shot of a kitchen table; medium shot of a person finding an unopened envelope; close-up of a hesitant hand; over-the-shoulder view of another person entering; two-shot as the envelope is offered. Rough clear lines, minimal background, consistent table positions, no text.
The envelope gives the camera something specific to follow. The changing shot size tests tension before a finished style or written conversation is added.
Before you publish
- Keep this pass rough enough to discard or rearrange frames easily.
- Generated frames do not substitute for a production shot list with checked numbers and timing.
Questions about this template
- How is this different from Japanese Manga?
- This entry is aimed at a rough planning stage. The Japanese Manga template emphasizes finished-looking linework and shading, while a storyboard should prioritize staging and sequence.
- Can I add dialogue now?
- Write it separately if it helps planning, but verify the images without it first. Add legible lettering after you have settled the order and space needed.
- What should I review first?
- Start with the reader’s path and the characters’ positions. Fine shading cannot fix a missing action or a confusing change of viewpoint.