

Single panel: one visible moment
Use one composition for a reaction, reveal, establishing shot or action beat. Specify one main action and a clear focal point instead of squeezing a whole scene into the frame.
Turn one story beat into a comic panel. Open the comic studio, choose 1 panel for a single frame or several panels for a sequence, and describe the cast, action and camera view. Review the result before continuing the story.

A reviewed single panel from The Lantern Relay
1 panel
shown from a published verification run
40 panels
in the complete reviewed sample
Open the comic studio and set Panels Num to 1 for one scene. For a strip or page, choose an available multi-panel layout. Options and limits vary by model and plan.
Name the cast, setting, camera distance, angle and emotion. Reuse the same character references and identity notes when continuing a scene.
Sign in, check the selected model’s credit message, then generate. Review faces, hands, framing and any dialogue; redraw or edit problems before continuing.
This is a workflow preview. The button opens the actual comic studio. Use its panel-count and layout options, style or template selection, model selection and Comic Text toggle; availability depends on your mode and plan. Describe camera direction in the prompt and review the generated composition.
One action, named characters, a setting, shot distance, camera angle and a short line of dialogue if needed. Avoid asking one frame to show several different moments.
The image is panel 1 from the published August 11 verification run. One targeted redraw corrected an extra mechanical-limb problem. This historical run does not test the current studio end to end.
Historical demonstration asset, reused without new image generation. Camera phrasing guides the model; it does not guarantee exact framing, lettering or character identity.
Choose the unit of storytelling first. A panel is one frame; a strip is a short sequence; a page is the canvas that arranges several frames. They need different briefs.
Use one composition for a reaction, reveal, establishing shot or action beat. Specify one main action and a clear focal point instead of squeezing a whole scene into the frame.
Separate setup, action and payoff into ordered panels. A strip may read across a row or down a vertical sequence; write what changes between frames and keep the cast recognizable.
A page combines frames, gutters, dialogue and a reading path. Plan the panel count and order, then inspect the complete page for cropped faces, crowded text and confusing transitions.
Single-panel example
In this reviewed medium two-shot, Asha carries a glowing lantern while Ren works beside her. Both characters share one location and moment. The first delivery duplicated Ren’s mechanical-arm anatomy; one targeted redraw produced the shown final panel. That revision is a practical reason to inspect hands and character traits before building the next frame.
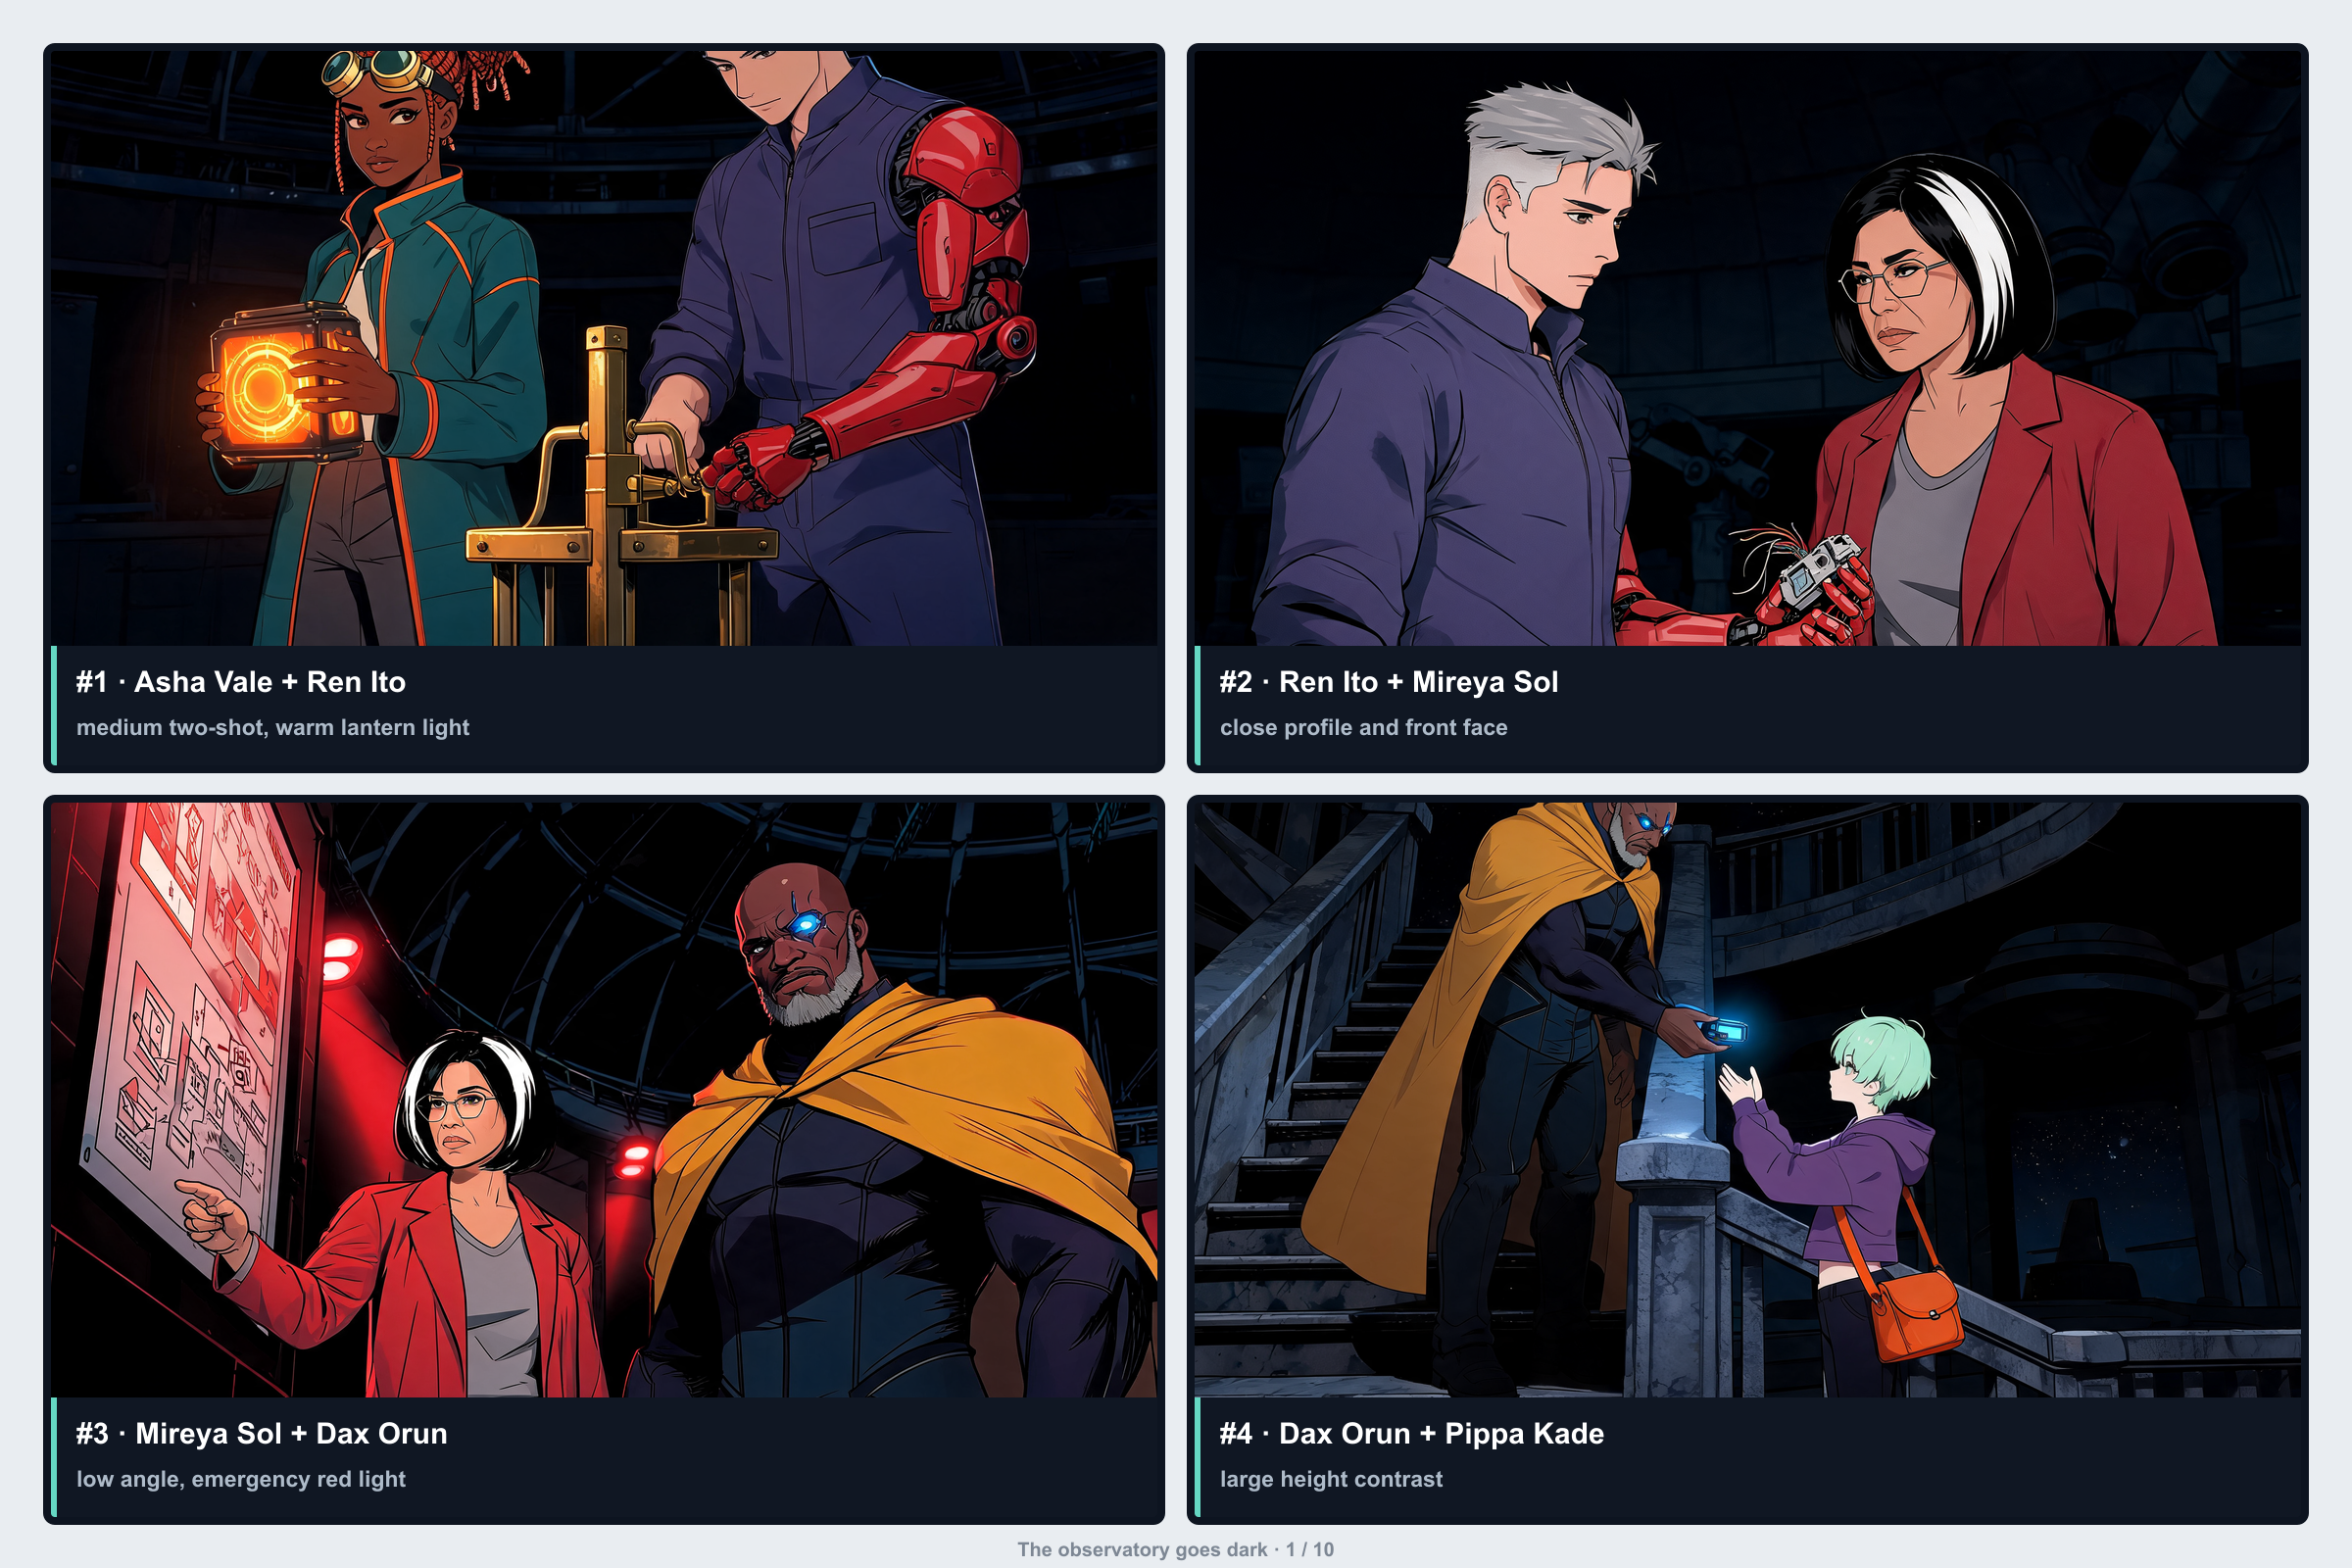
Full-page example
The first page of the same demonstration assembles four panels: a medium two-shot, a closer character exchange, a low-angle view and a frame with contrasting character heights. Inspect how each frame changes the viewer’s focus. The labels identify cast and composition for review; they are not finished story dialogue. A short strip would use the same beat-by-beat planning with its own layout and pacing.
Workflow guide
Begin with one clear moment. Select the actual studio settings yourself; the examples on this page do not preselect a model, layout or character reference.
Open the comic studio and set Panels Num to 1 for one scene. For a strip or page, choose an available multi-panel layout. Options and limits vary by model and plan.
Name the cast, setting, camera distance, angle and emotion. Reuse the same character references and identity notes when continuing a scene.
Sign in, check the selected model’s credit message, then generate. Review faces, hands, framing and any dialogue; redraw or edit problems before continuing.
These are new practice prompts, not the recorded inputs for the historical sample above. Copy a prompt into the studio and choose the panel count and other settings yourself. Camera wording is direction for the model, so inspect the result and revise when needed.
It turns a written scene brief into the artwork for a comic frame. Describe the characters, visible action, setting and camera view. LlamaGen’s comic studio lets you choose a panel count, so you can begin with one frame or plan a sequence.
Open the comic studio and set Panels Num to 1 in the layout controls where supported by the selected mode. Write one visible story beat, choose the available style or template and model, then generate and review the result. More actions usually need more panels.
A panel is one framed moment. A strip is a short ordered sequence, such as setup, action and payoff. A page is a canvas containing several panels and their reading path. A four-panel page is not automatically a vertical webtoon; scrolling rhythm needs separate planning.
Use the scene prompt to describe shot distance and camera angle. The studio also provides panel-count and layout choices, style or template selection, model selection and a Comic Text toggle, depending on mode and plan. These guide generation; they do not guarantee an exact crop, text spelling, bubble position or a permanently locked character style. Review and edit the output.
Reuse the same approved references, names and identity notes, including face, hair, clothing and distinctive traits. Check those details in every frame. Multi-character options and limits depend on the plan. The linked 40-panel sample required three redraws, so it should not be read as a promise of perfect first-pass consistency.
The displayed single panel and review page come from The Lantern Relay, a published verification run generated with Seedream 5 Lite on August 11, 2026. Codex visual QA reviewed 8 characters across 40 panels; 37 panels passed first review and three targeted redraws were recorded. The review pages use diagnostic labels instead of finished dialogue. This is one historical run, not a customer case or a fresh end-to-end test of today’s comic studio.
No. Panel count is a composition choice. Generation requires sign-in and uses credits; charges depend on the model, resolution and any minimum generation charge. Check the credit information shown in the workspace before generating. Available layouts, character limits and paid templates also depend on the plan.
Use Manga Maker when you need a separate page-composition editor for panels, imported images, text and speech bubbles. Use the comic studio to generate the artwork and review each frame before assembly. Check lettering, gutters, panel order and the complete page at its intended reading size.
Choose one panel, describe what the reader should see, and review the generated frame. Build the next beat only after its characters and composition work.