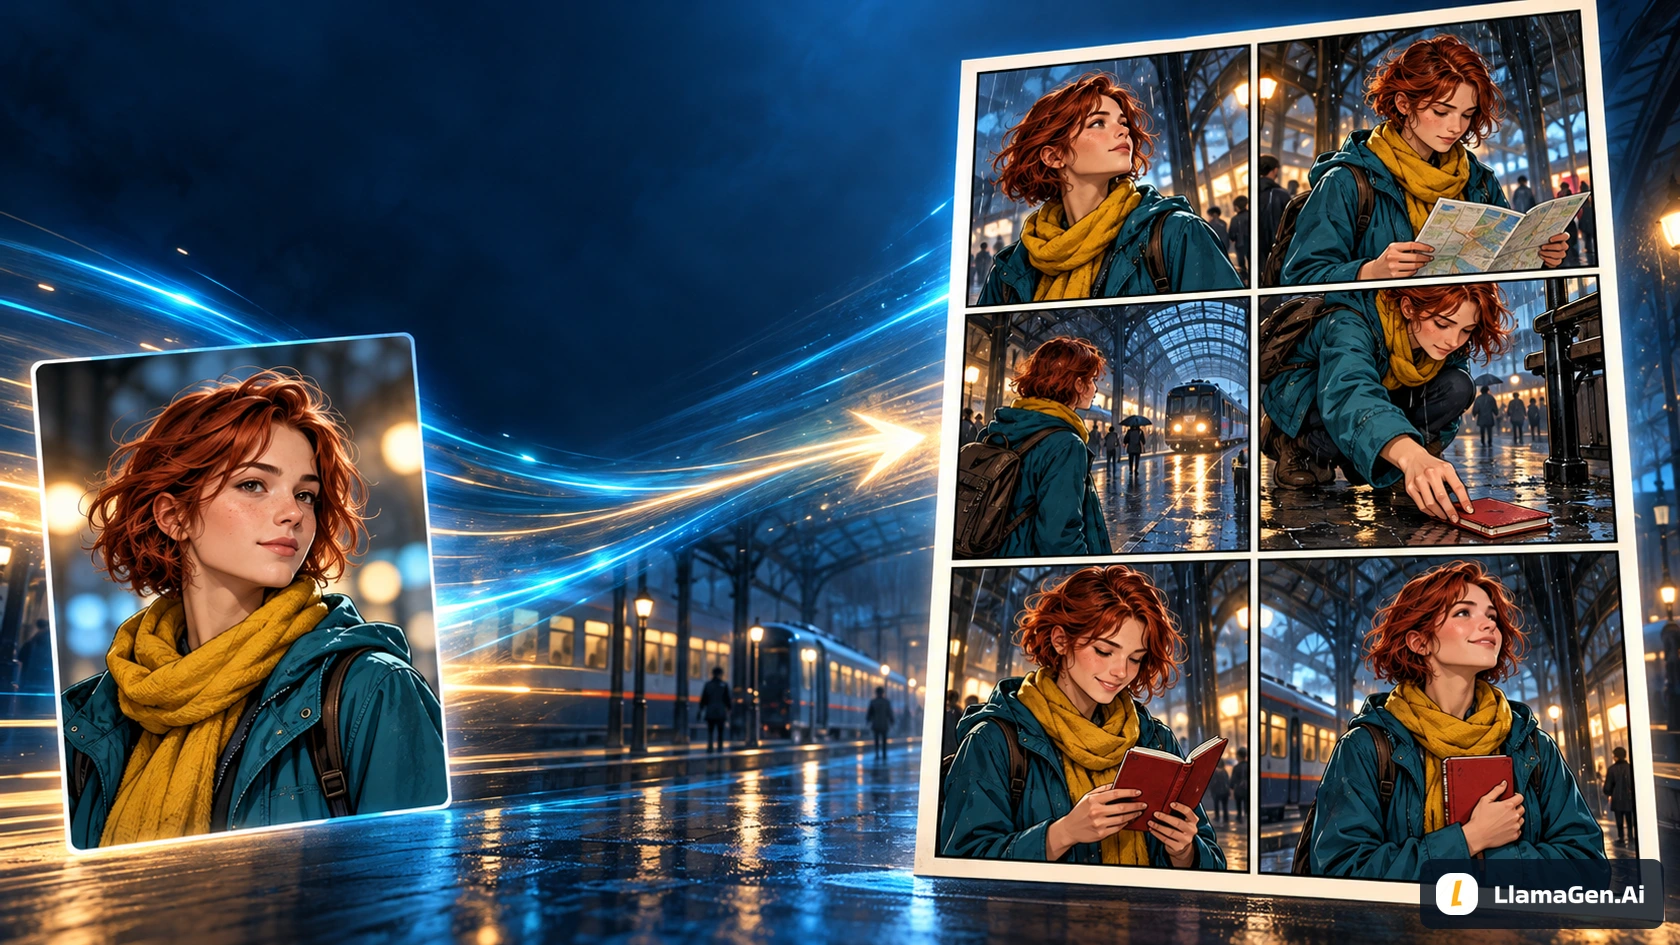
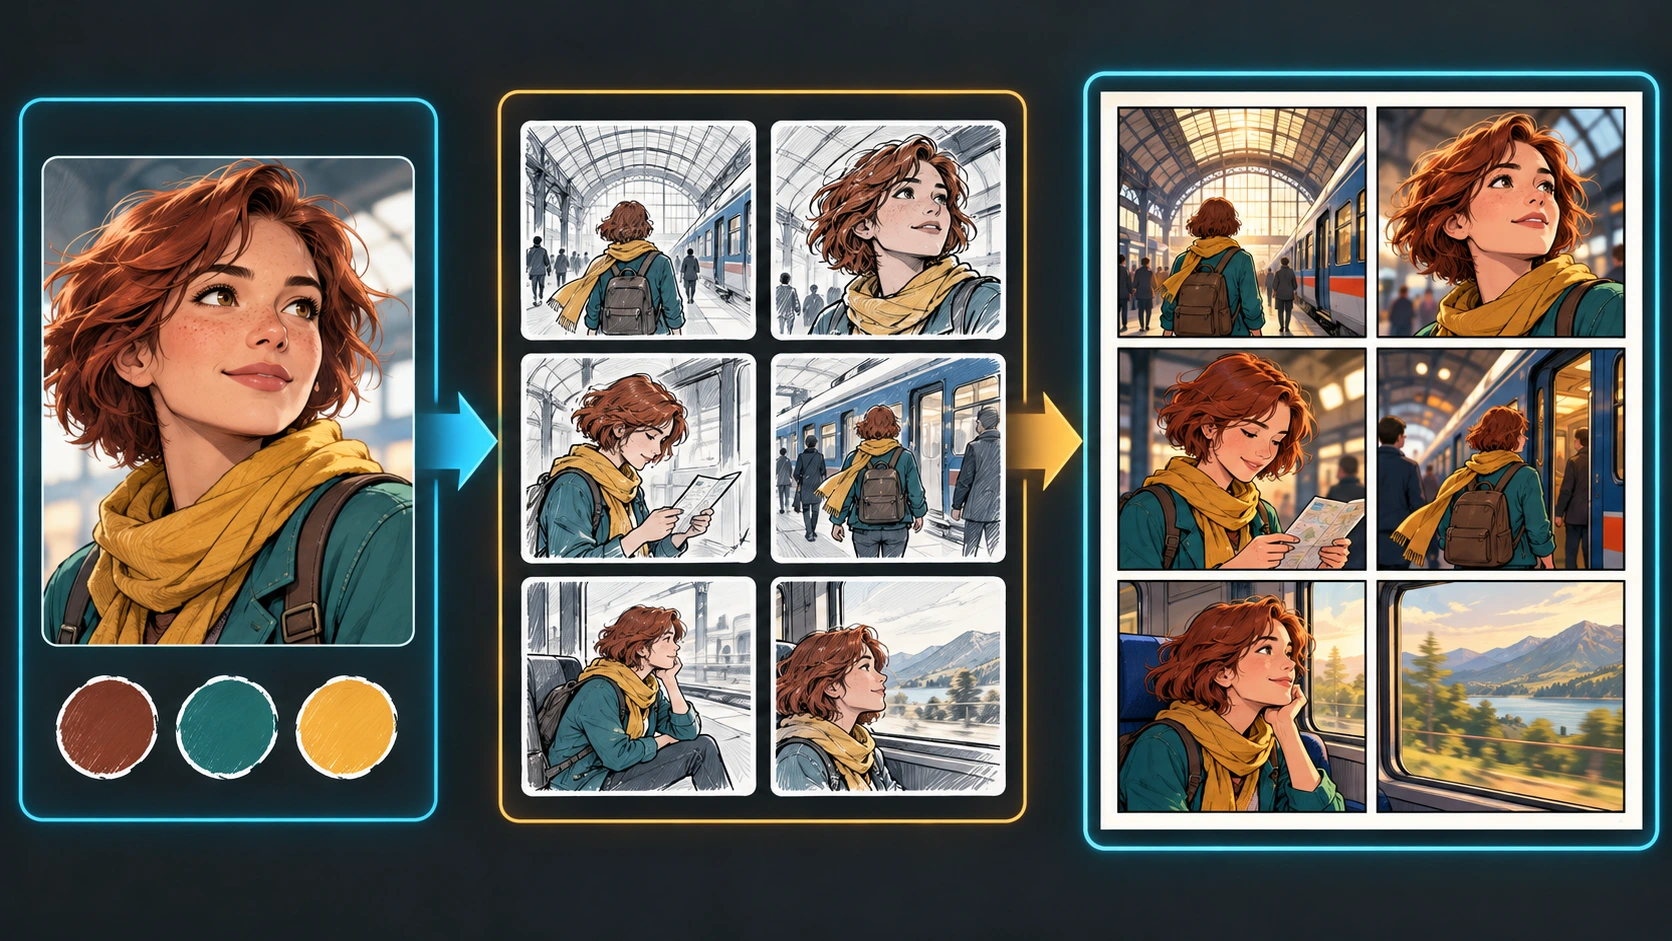
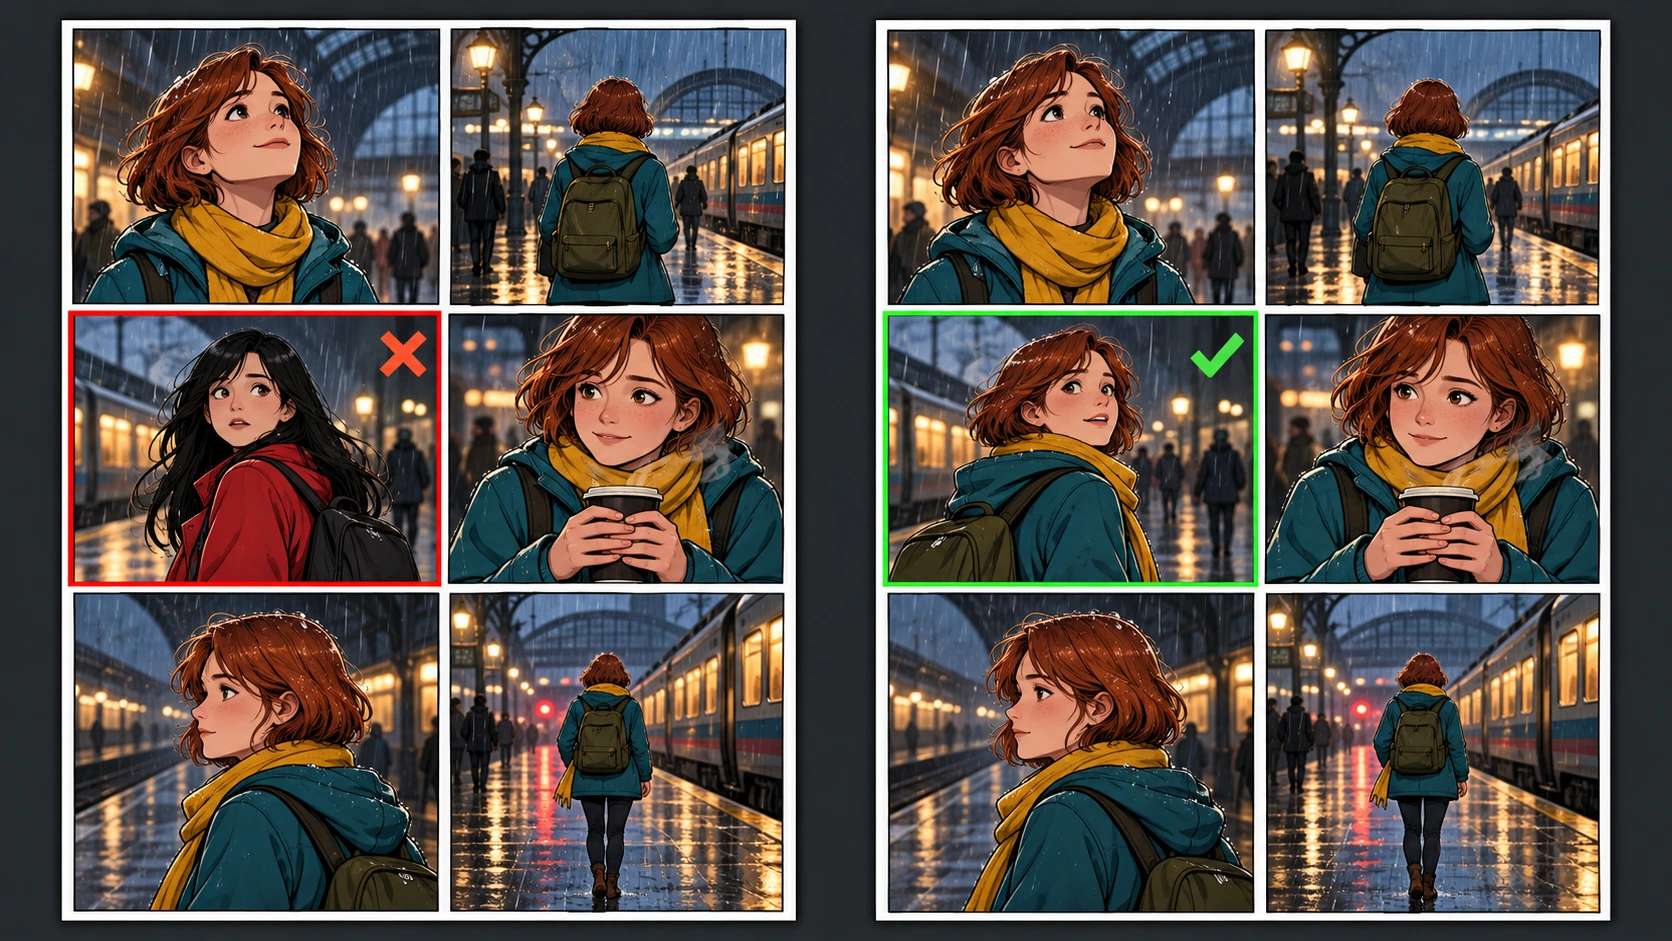
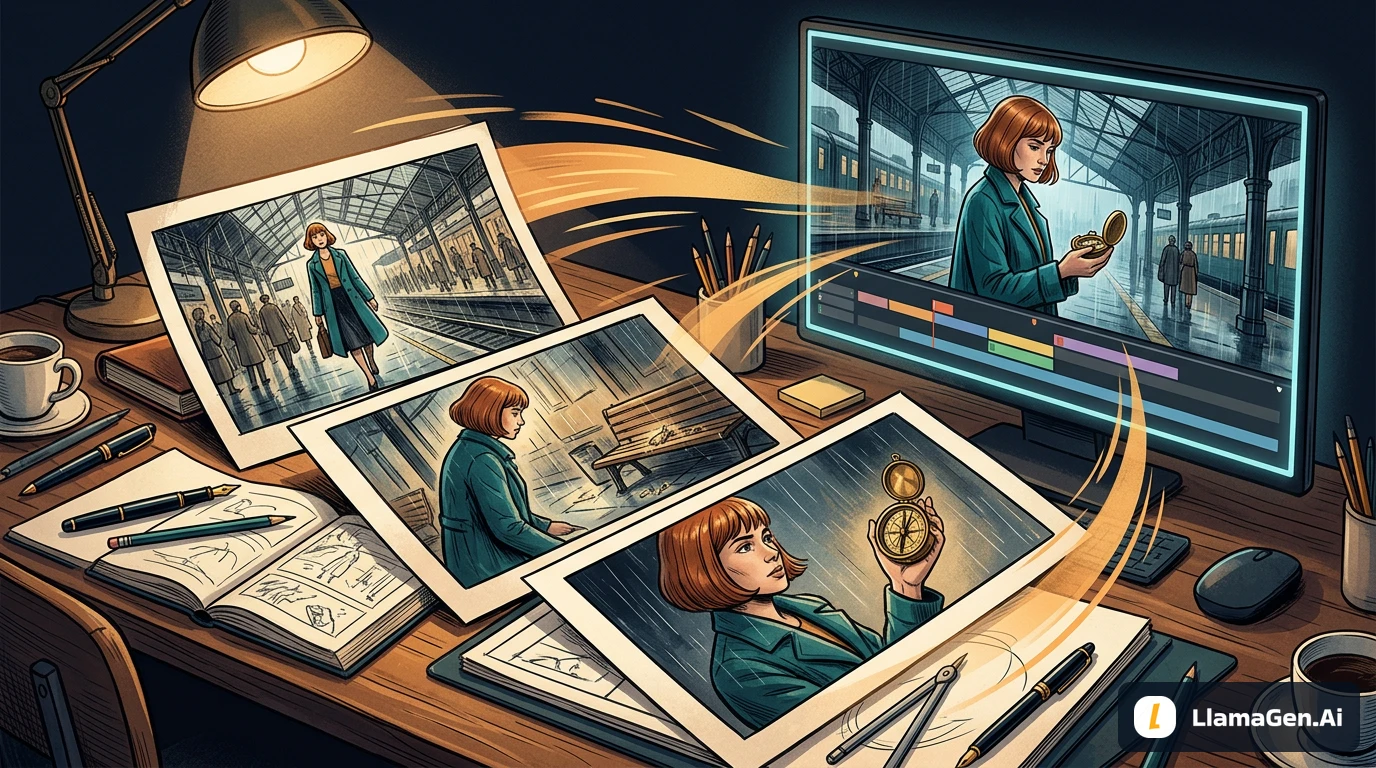
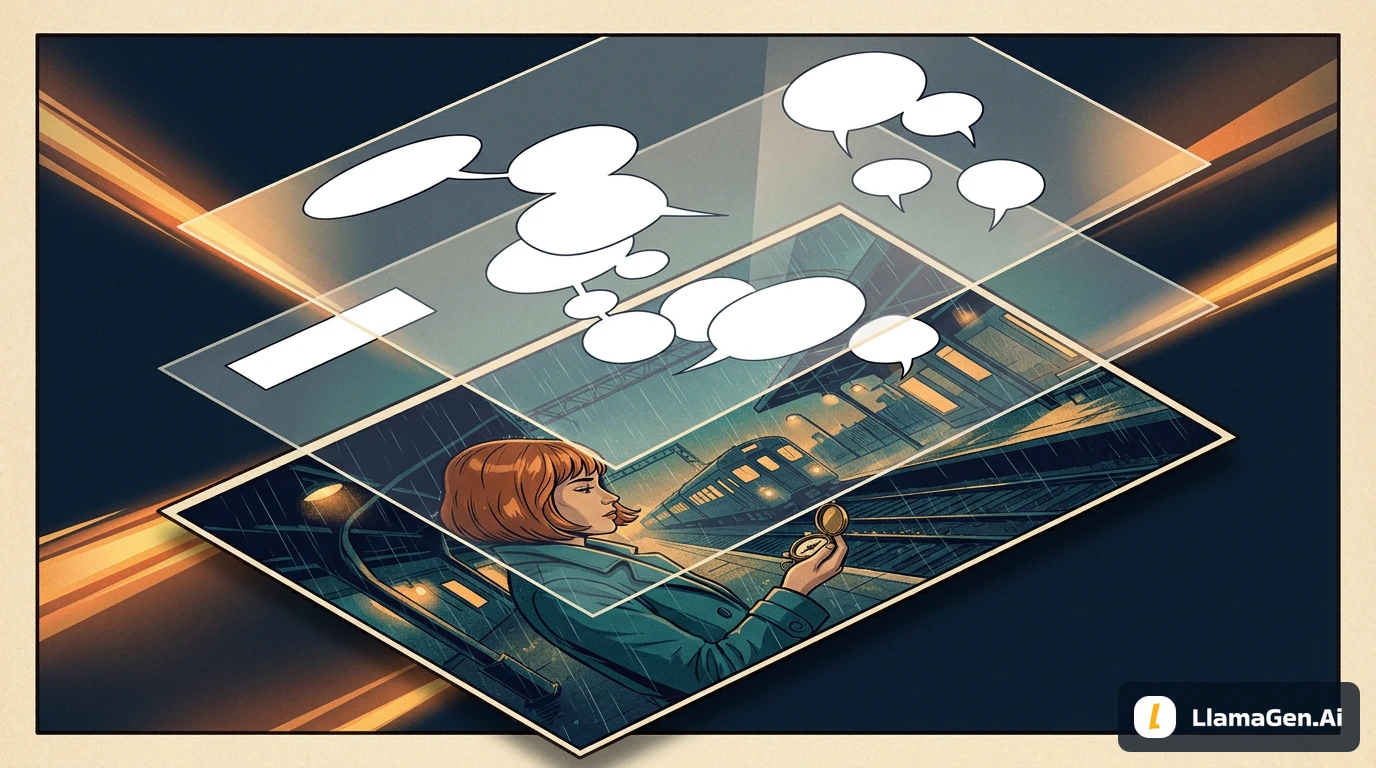
Bring one approved OC image, write six visible story beats, and select six panel slots in LlamaGen.AI Comic Studio. A reference describes who appears; the panel plan describes what happens.
Example scope — November 11, 2026: This article reuses the recovered Maya manuscript and its five original illustrations. Those illustrations are teaching concepts, not screenshots or proof of a saved Comic Studio project. The current operating guidance is checked against the public workspace, official reference, layout, and redraw documentation, plus the editor source available in this workspace. The recovered plates use an earlier painterly interpretation; the new exercise uses the later clean-line reference sheet. Compare outputs with their own input, not across these two illustrative styles. A separately labeled image-API exercise appears below. Browser navigation was unavailable for a signed-in Studio walkthrough.
The Short Answer
To make one comic page with six images in LlamaGen.AI, use this workflow:
In the new-page layout control, choose six panel slots and a readable layout.
Add a clear OC reference and describe its role.
If using a saved character, confirm it is selected and available in your plan.
Write one page prompt with six numbered visual beats.
Generate a draft, then review the actual count, story order, and character consistency.
Revise a weak panel with the controls available to your account, then add editable lettering after the art is stable.
The core idea is to separate three jobs: the reference controls who appears, the six beats control what happens, and the layout controls how the page is assembled.
What You Will Make
The example page follows Maya, a traveler who finds a lost red notebook in a rainy train station. It uses:
One saved character reference
One stable outfit description
Six visual beats
One 2-by-3 page layout
No generated lettering inside the artwork
Editable dialogue added after the page is generated
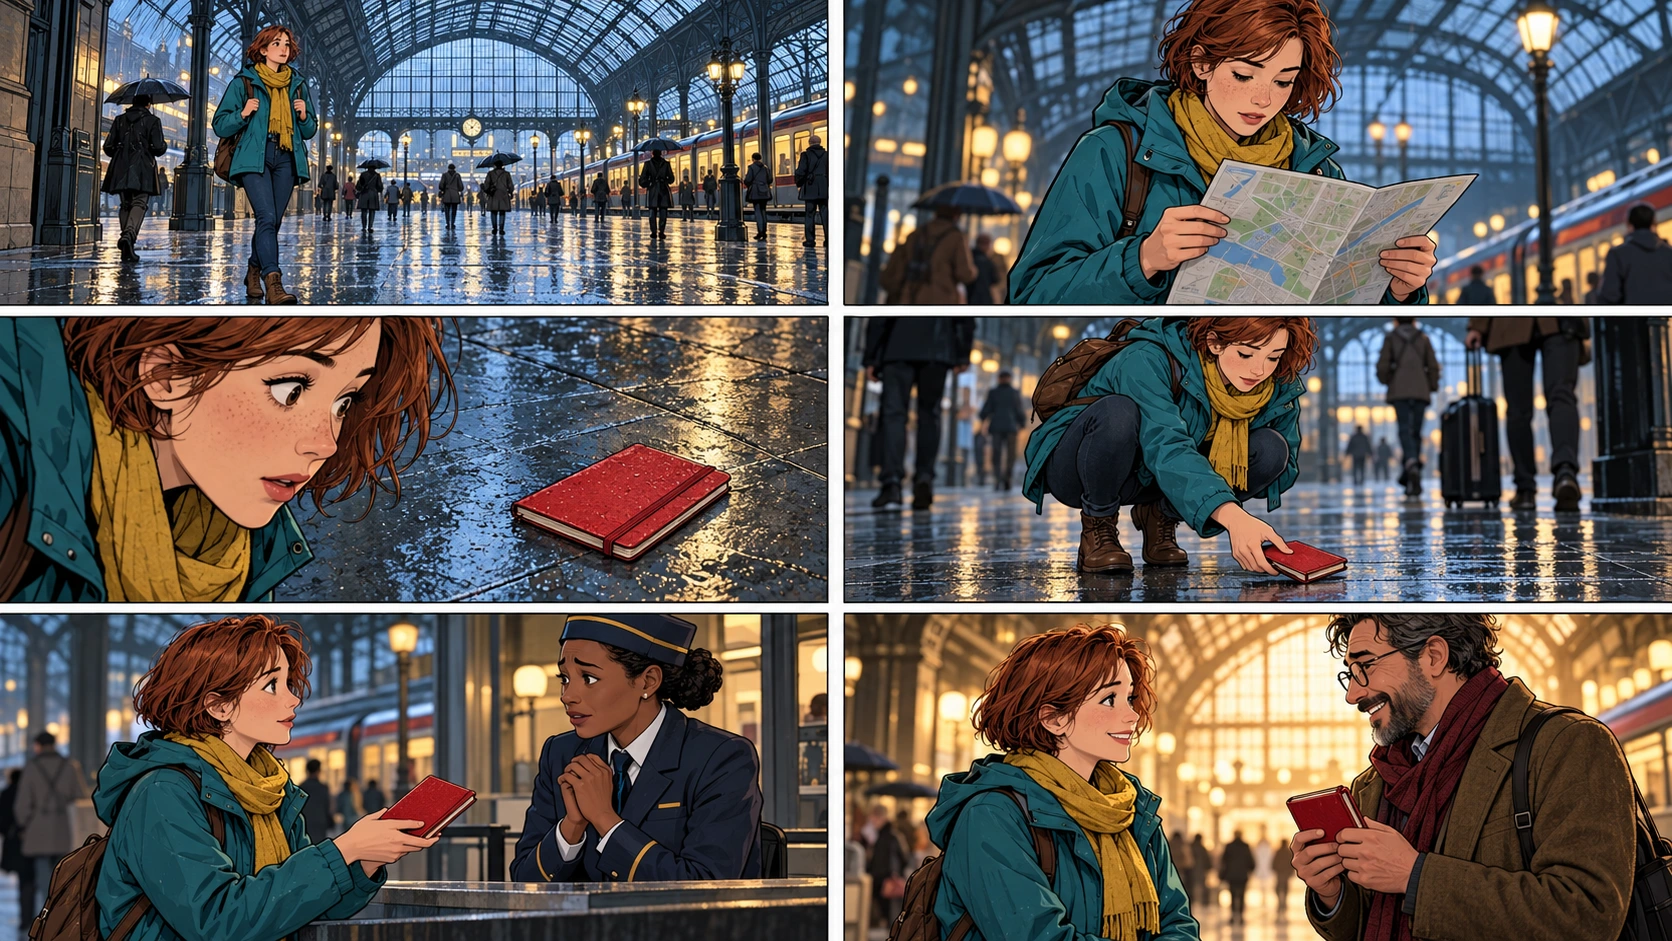
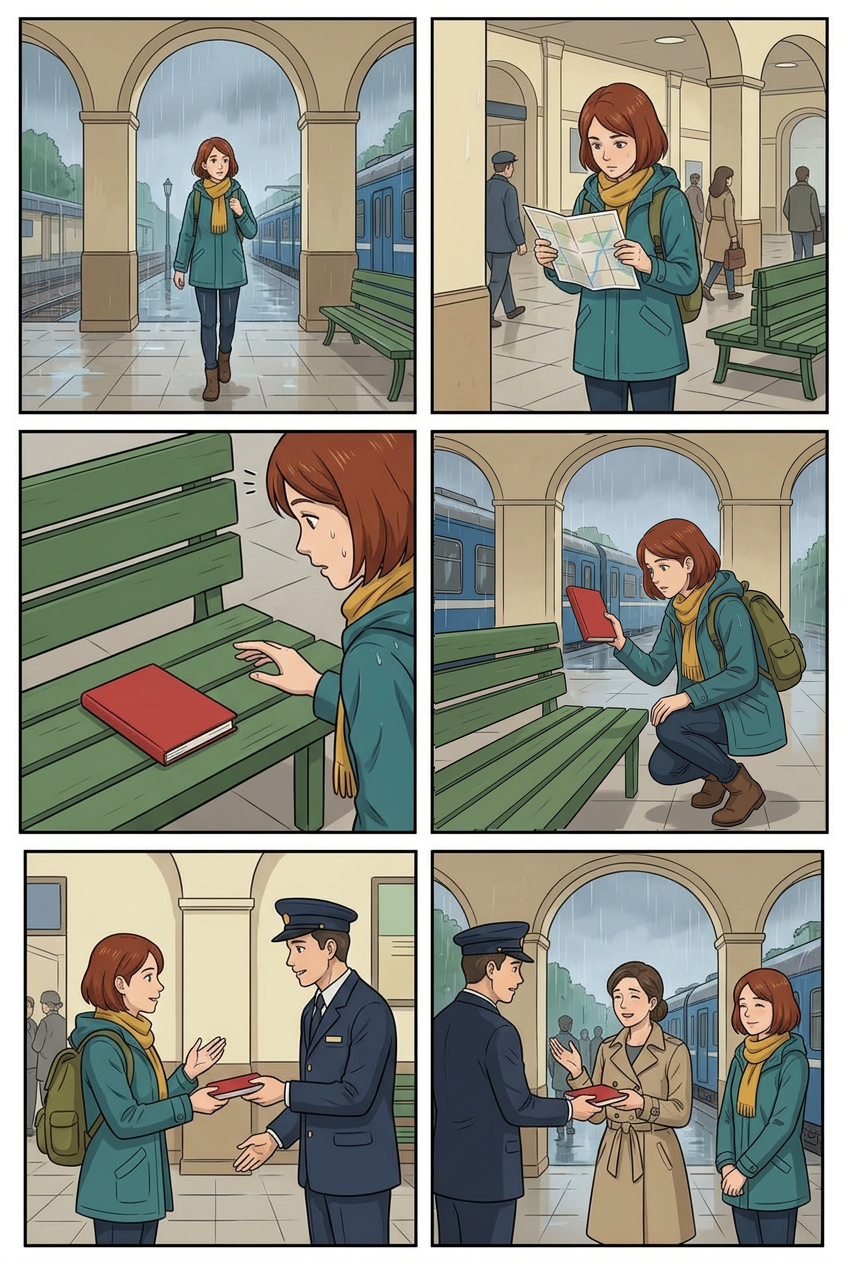
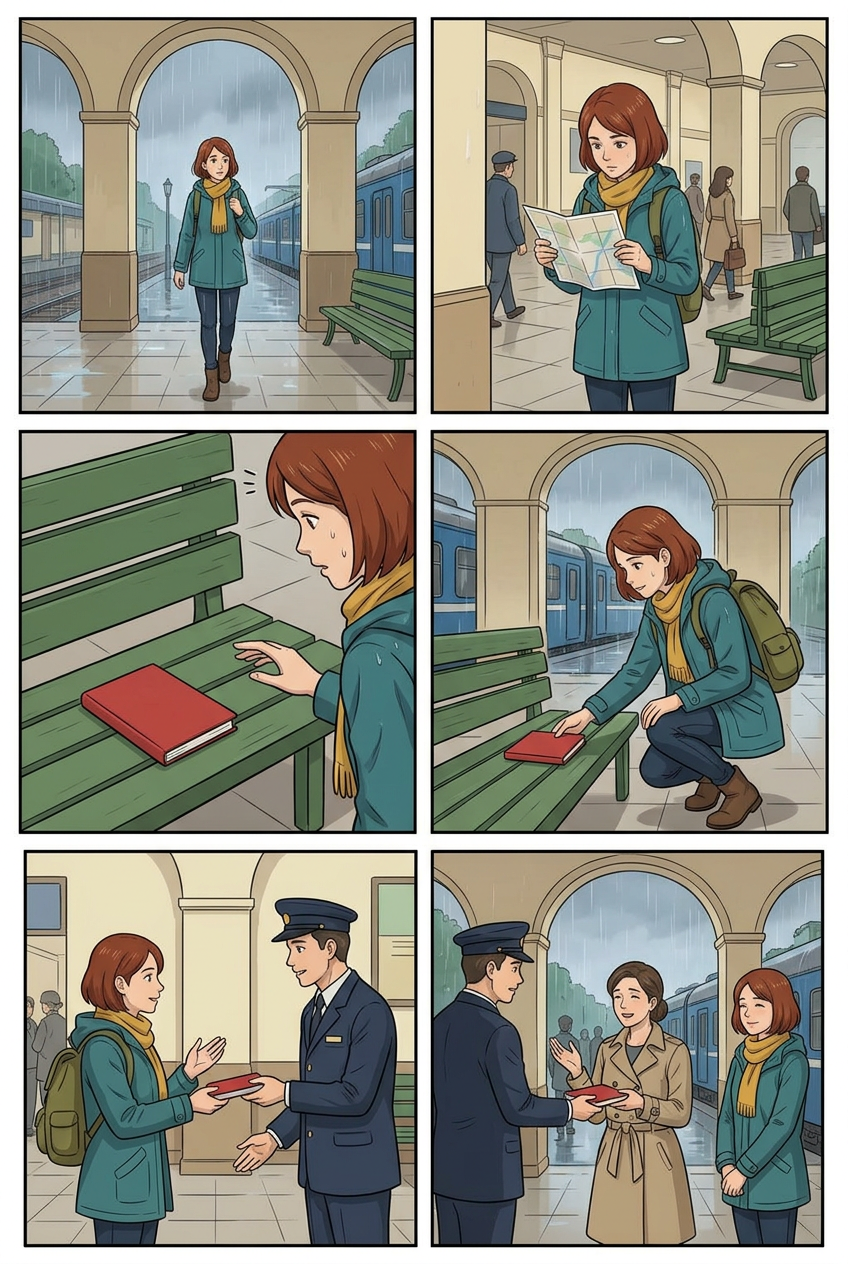
The finished sequence reads left to right and top to bottom:
Maya enters the station.
She checks a folded map.
She notices a red notebook.
She picks it up.
She gives it to a station attendant.
The owner gets the notebook back.
Nhật ký thay đổi
Khơi dậy ước mơ cho thế hệ trẻ Nơi hàng triệu câu chuyện trở nên sống động
Tổng hợp các tính năng mới nhất của LlamaGen, cải tiến sản phẩm, cập nhật thiết kế và các bản sửa lỗi quan trọng.
✦
✧
✦
✧
Một phương tiện mới cho Kể chuyện
Thỏa sức tạo ra không giới hạn câu chuyện, truyện tranh, hoạt hình, trò chơi và hơn thế nữa—chỉ trong vài giây, phù hợp với khán giả hiện đại
Recovered concept illustration: use it to read the six beats, not as evidence of a current Studio generation.
You can replace this story with your own. Keep the structure simple until your first page works, then experiment with irregular layouts, multiple characters, or denser dialogue.
Step 1: Prepare a Useful Reference Image
A reference image guides the generated character. It does not paste the original picture unchanged into every panel.
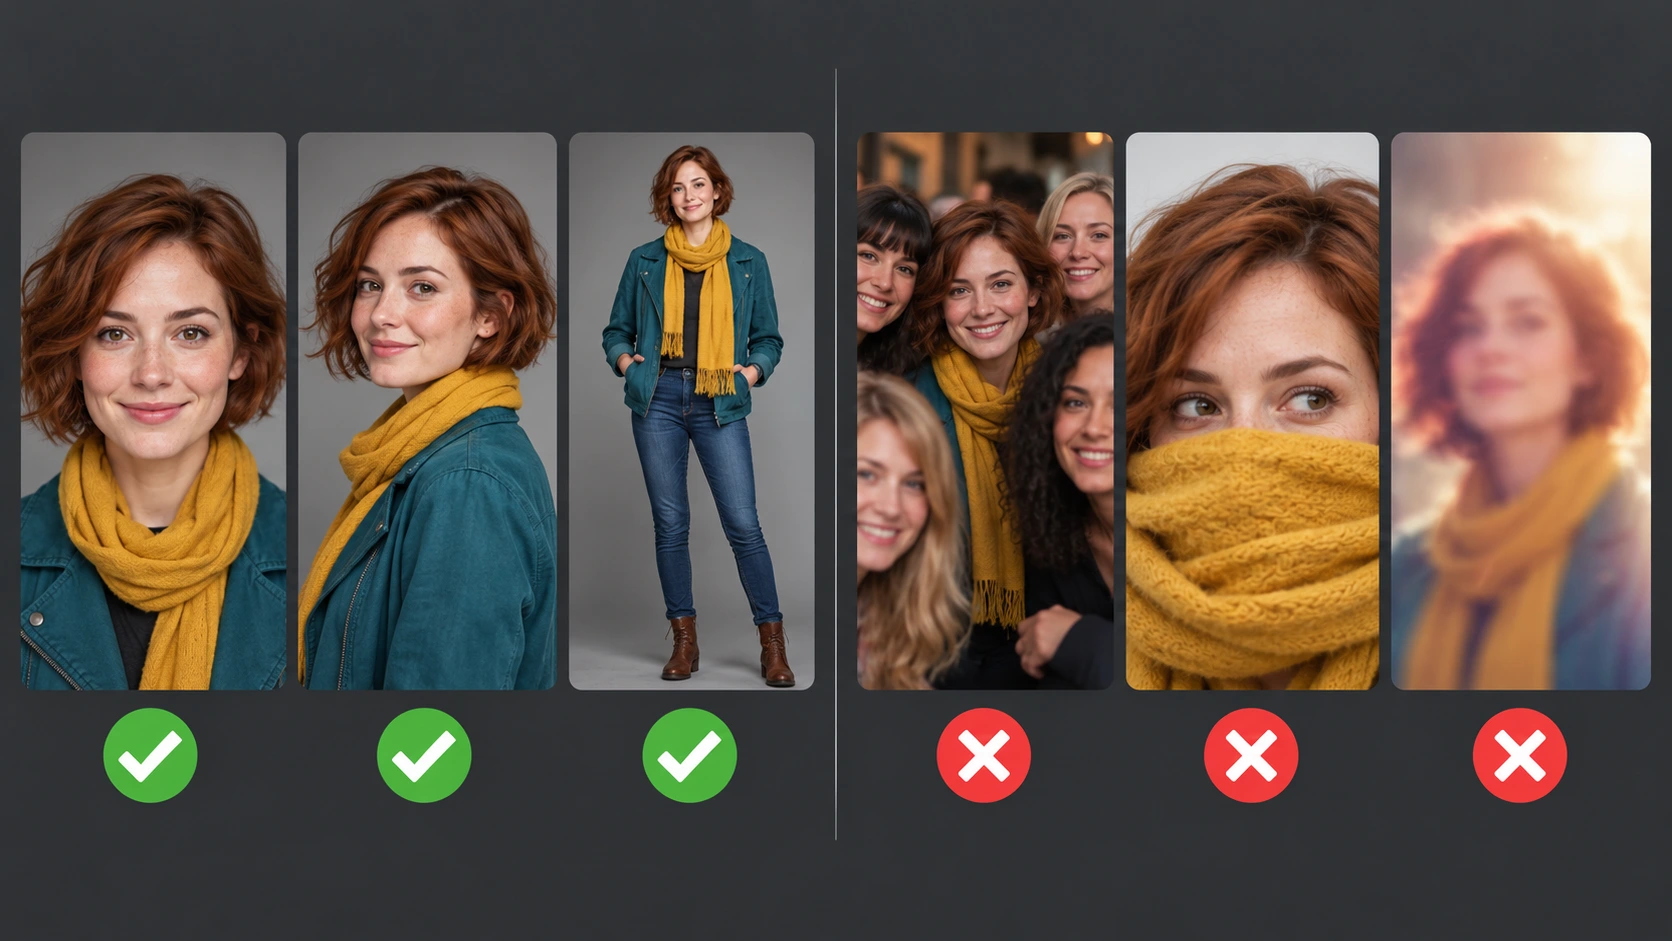
For a dependable first test, choose an image with:
One clearly visible character
An unobstructed face
Even lighting
A readable hairstyle and silhouette
Clothing that you want to reuse
Enough resolution to inspect important details
Avoid references with:
Several people and no obvious subject
A face hidden by hands, hair, sunglasses, or a deep crop
Heavy beauty filters
Strong motion blur
A tiny character in a busy background
Conflicting outfits combined into one character reference
If your page has two recurring characters, prepare one clean reference for each character and save them separately. Do not ask one ambiguous group photo to define two identities unless you intentionally use a multi-character workflow and verify the extracted characters before generating the page.
Only upload images that you own or have permission to use.
Step 2: Save Your Image as a Reusable Character
Start from the approved image in your OC reference sheet. In the current composer, use the available attachment control for page references. If your plan offers the saved-character library, select or create Maya there and confirm the correct character is attached to this comic.
A page-level attachment does not assign one image to one panel by position. Give every reference a role: Maya's appearance, the station setting, or a prop. For a panel-specific reference, use that panel's edit controls where available. Do not upload an ambiguous group image and assume its people will become separate saved characters automatically.
Use the same character name in the page prompt. This makes the connection between the selected reference and each panel instruction easier to follow.
For example:
Maya is the selected saved character.
Keep Maya's face, short auburn hair, teal rain jacket,
mustard-yellow scarf, dark jeans, and brown boots consistent
in all six panels.
Treat this as a lock file for visible traits. Include only details that must remain stable. Emotions, poses, camera angles, and lighting should be allowed to change from panel to panel.
Step 3: Select Six Panels Before You Generate
Open Comic Studio. In the composer layout selector, choose six panels when offered by your account. A six-panel template is optional if the count and layout are already set; a written prompt alone does not create six layout slots.
Then open the page layout control and confirm:
Panels Num: 6
Layout: a six-panel page layout
Reading order: left to right, top to bottom
The page layout controls the slots. Keep a template choice, if used, consistent with that layout. On an existing project, distinguish the current-page layout from the settings for the next page.
For a first page, a regular 2-by-3 grid is useful because it makes sequence problems obvious. You can choose a more cinematic six-panel layout later, but the reading order must still be clear.
Important: changing an existing page to a layout with fewer panels can remove panel prompts and images from that page. Save original images and copy important prompts before reducing the panel count.
Step 4: Turn the Story Into Six Visual Beats
Do not paste a long paragraph and hope the model decides where every panel begins. Write exactly six beats, with one important change per beat.
A useful six-panel pattern is:
Panel
Story job
Useful shot
1
Establish the location
Wide shot
2
Show the character's immediate goal
Medium shot
3
Introduce the object or problem
Close-up
4
Show the character acting
Medium or low-angle shot
5
Show the consequence
Two-shot or wide shot
6
Resolve the beat or end with a hook
Reaction or reveal shot
Each panel should describe a visible moment, not a chain of actions.
Weak:
Maya enters the station, reads the map, sees a notebook,
picks it up, finds an attendant, and returns it to the owner.
Stronger:
Panel 1: Maya enters the rainy station.
Panel 2: Maya studies a folded map.
Panel 3: Maya notices a red notebook on the floor.
Panel 4: Maya crouches and picks up the notebook.
Panel 5: Maya gives the notebook to a station attendant.
Panel 6: The relieved owner receives the notebook from Maya.
The second version gives every panel one job and one dominant action.
Step 5: Use This 6-Panel Prompt Template
Paste this structure into the prompt box and replace the bracketed details:
Create one complete six-panel comic page.
Reading order is left to right, then top to bottom.

CHARACTER LOCK
[Character name] is the selected saved character.
Keep the same face, hairstyle, age, body type, outfit,
and signature colors in every panel.

PAGE SETTING
[Location, time of day, weather, and recurring background anchors.]

PANEL 1 - ESTABLISH
[Shot type, visible character, one action, emotion, background.]

PANEL 2 - GOAL
[Shot type, visible character, one action, emotion, background.]

PANEL 3 - DISCOVERY
[Shot type, important object or problem, character reaction.]

PANEL 4 - ACTION
[Shot type, one clear action, required prop and hand position.]

PANEL 5 - CONSEQUENCE
[Shot type, interaction or result of the action.]

PANEL 6 - RESOLUTION OR HOOK
[Shot type, final emotional beat or unanswered question.]

PAGE RULES
- Exactly six panels, no extra panels.
- Keep the selected character consistent in every appearance.
- Keep recurring props and location details consistent.
- Vary wide, medium, and close-up shots.
- Leave clean negative space for editable speech bubbles.
- Do not draw unreadable lettering inside the artwork.
Here is the complete sample prompt used for the station page:
Create one complete six-panel modern comic page.
Reading order is left to right, then top to bottom.

CHARACTER LOCK
Maya is the selected saved character. Keep her face, short auburn hair,
teal rain jacket, mustard-yellow scarf, dark jeans, brown boots,
and olive backpack consistent in every panel.

PAGE SETTING
A large glass-roofed train station on a rainy evening. Wet reflective floor,
blue passenger train, warm station lamps, travelers with umbrellas.
Keep the station architecture and train colors consistent.

PANEL 1 - wide establishing shot
Maya enters the station from the left, carrying her olive backpack.
The wet floor reflects the station lights and the blue train.

PANEL 2 - medium shot
Maya studies a folded paper map. Her expression is focused but uncertain.
Leave open space above her right shoulder for a speech bubble.

PANEL 3 - close-up discovery
Maya notices a small red notebook lying on the wet floor near a bench.
Show Maya's face and the notebook clearly in the same panel.

PANEL 4 - low medium shot
Maya crouches and picks up the red notebook with her right hand.
Keep her jacket, scarf, backpack, and notebook design unchanged.

PANEL 5 - two-shot
Maya hands the red notebook to a uniformed station attendant at an information desk.
The attendant looks relieved. Leave room above both characters for dialogue.

PANEL 6 - warm resolution
The notebook's owner receives it and thanks Maya. Maya smiles.
Use warmer light while keeping the same station and blue train in the background.

PAGE RULES
- Exactly six panels, no extra panels.
- Keep Maya identical to the selected character reference.
- Keep the red notebook identical from panels 3 through 6.
- Use clear gutters and readable visual flow.
- No embedded text, captions, labels, or watermarks.
Why the Prompt Has Three Layers
The most reliable page prompt separates information by scope:
Character lock: details that should stay the same everywhere.
Panel beats: details that change from image to image.
Page rules: layout and reading constraints that apply to the complete page.
If you repeat the entire character biography inside every panel, the prompt becomes noisy. If you mention the character only once without a stable description, later panels may drift. A short character lock plus six focused beats is easier to review and repair.
Step 6: Generate a Draft Before Adding Dialogue
Generate the visual page first. During the first review, ignore minor wording and check these higher-impact questions:
Are there exactly six panels?
Is the reading order obvious?
Does every panel have a different story job?
Does the character keep the same face, hair, outfit, and colors?
Does the red notebook remain the same object?
Do camera distances vary?
Is there empty space for bubbles?
Do not regenerate a good page because one hand, face, prop, or panel is weak.
Step 7: Repair One Weak Panel at a Time
When one panel has the wrong hair, outfit, pose, or prop, edit that panel instead of restarting the entire page.
Open the affected panel's menu. Depending on the available tools in your plan and editor view, use the panel prompt edit, redraw, replacement, or Partial Modification workflow. Restate only the missing constraints:
Repair this panel only.
Use the selected Maya character reference.
Restore Maya's short auburn hair, teal rain jacket,
mustard-yellow scarf, and olive backpack.
Keep the pose, camera angle, station background,
panel crop, and red notebook unchanged.
If several existing panels need new prompts, paid accounts may also offer batch redraw. Start with a small selection and save the current images first, because redraw creates new artwork rather than restoring the old result.
Recovered conceptual repair diagram: it is explanatory, not a measured before-and-after output. Only the separately labeled local composition below has a decoded-pixel comparison.
Use Partial Modification for a local area when the composition is already good. Use a panel redraw when the whole pose or camera setup is wrong. If the exact uploaded drawing must appear unchanged, use the panel's replace-image option rather than asking generation to reproduce it pixel for pixel.
Step 8: Add Speech Bubbles After the Art Is Stable
Generated lettering is harder to control than editable text. For a cleaner page:
Ask for negative space where dialogue will go.
Generate the artwork without embedded words.
Open the bubble or text tools currently offered in the editor.
Add and position editable speech bubbles.
Set the font and size after checking the page at normal reading scale.
Keep the dialogue short. A useful first pass for six panels is zero to two short lines per panel. If a bubble covers a face, hand, or important prop, move or shorten it before changing the art.
Character references and background references solve different problems.
A character reference guides identity, clothing, and recurring visual traits.
A background reference guides a location, architecture, room, or recurring environment.
To reuse a location, attach an appropriate environment reference with the available page or panel reference controls and state its role in the prompt. If your workspace offers saved locations, confirm that the intended one is selected. Do not assume every account has the same selector or location-library workflow.
Uploading a background is not always the same as selecting it for generation. Run a short test page before producing a longer chapter.
Common Problems and Fixes
The Result Has Five or Seven Panels
Confirm six panel slots in the appropriate current-page or new-page layout, and begin the prompt with Create one complete six-panel comic page. Keep exactly six numbered beats and add no extra panels to the page rules.
The Character Changes Between Panels
Confirm that the saved character is selected in Characters. Use the same character name in the prompt. Shorten the lock to five or six unmistakable traits, and repair the first drifting panel before generating more pages.
Repeat location anchors and props across the page. Use cause and effect between beats: Maya sees the notebook, picks it up, hands it over, and sees it returned. Six attractive poses are not automatically a story.
Every Panel Is a Close-Up
Specify shot types. A practical mix is two wide shots, two medium shots, one close-up, and one two-shot or reaction shot.
The Model Ignores Important Prompt Details
Reduce each panel to one action. Move global traits into the character lock. Remove decorative adjectives that do not affect the story. Put the most important visible instruction first.
The Reference Image Is Not Reproduced Exactly
That is expected. A reference guides a newly generated character; it is not a promise of pixel-for-pixel placement. If exact reproduction matters, add or replace the panel image with the original asset.
Dialogue Looks Garbled
Remove dialogue from the image-generation prompt and add editable bubbles afterward.
Final 6-Panel Page Checklist
Before exporting, verify:
The page contains exactly six panels.
The intended reading order is obvious.
The selected reference character is recognizable in every appearance.
Hair, outfit, colors, and signature accessories remain stable.
Each panel contains one main action.
Shot sizes vary across the page.
Important props remain visually consistent.
Speech bubbles do not cover faces, hands, or story clues.
No generated gibberish remains inside the artwork.
The downloaded page has the dimensions required by your publishing workflow.
Start Your Own Six-Panel Page
Open LlamaGen.AI Comic Studio, select six panel slots, attach the approved OC reference, and paste the six-beat prompt structure from this tutorial.
Start with one character, one location, and one simple cause-and-effect story. Once that page reads clearly, reuse the same saved character and prompt structure for page two.
FAQ
Can I use more than one reference image?
Yes, but keep each character reference unambiguous. For two recurring people, save two characters separately and select both for the comic. Available character limits and advanced consistency controls can depend on the current plan.
Is the six-panel comic template included in every plan?
Six-panel layouts, templates, saved characters, and editing options can have different plan conditions. Check the options and any upgrade or credit message shown in your account; this article does not establish a universal entitlement.
Should I generate six separate images or one complete page?
Start with one complete six-panel page when you want fast pacing and layout feedback. Generate or replace individual panels when a specific image needs tighter control.
Can I use a photo of myself?
Yes, if you own the image and are comfortable using it as a generation reference. Choose a clear single-person image without heavy filters or face obstruction.
Will my uploaded drawing remain exactly unchanged?
Not when it is used as a generation reference. The system uses it to guide a new image. Use the replace-image workflow when the exact original artwork must appear in the panel.
What should I send support if the workflow fails?
Include the artwork ID, the selected character name, the affected panel number, the prompt you used, your intended result, and screenshots showing the selected reference and the incorrect output. Do not send passwords or payment information.
Evidence from the image-API exercise
For this revision, we generated a real six-panel illustration through LlamaGen.AI's image playground API using the same Maya reference sheet. The recorded provider/model is Vertex Nano Banana 2.1. This was not a saved Comic Studio project, and the image API does not validate the Studio's panel slots, bubble tools, or export controls.
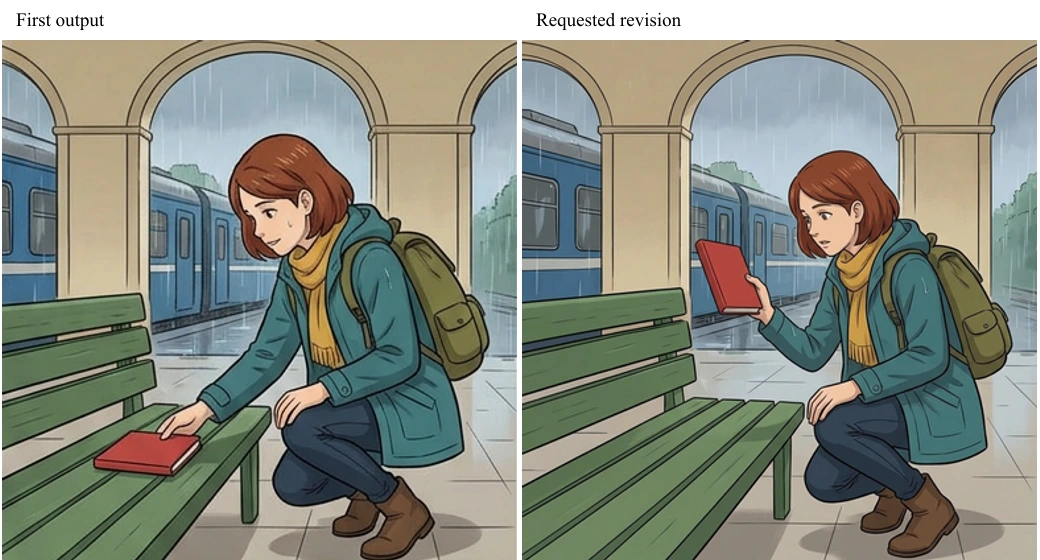
The initial PNG contains six bordered panels in two columns and three rows. It follows the recovered notebook story, but in panel 4 Maya's hand touches a notebook still resting on the bench. We wanted the action of lifting it to be clearer.
We requested one replacement illustration of that scene, with the red closed notebook visibly held above the bench. The replacement changes details inside the panel, including the background framing. We then composited it locally inside a fixed rectangle in the middle-right panel.
A decoded-pixel comparison found zero changed pixels outside the replacement rectangle. That protection comes from the local composition step; it is not a claim that native Studio redraw has a pixel-lock guarantee. The replacement rectangle was 390 × 394 pixels, beginning at x=435, y=435 in the 848 × 1264 page.
This is the revised image-API illustration, not a Studio screenshot. The PNG was saved and decoded at 848 × 1264 pixels. The original first pass is retained for comparison. The recovered conceptual page shown earlier is a separate teaching illustration.
The run retains the full prompts, reference hash, prediction IDs, original outputs, revision, rectangle, and final-file hash. Studio credit cost, settled monetary cost, signed-in project behavior, bubble editing, and native export were not measured. In your project, verify those steps using the options shown in your account.
Editorial Note
Written by Jay and reviewed against the LlamaGen.AI comic editor available on October 10, 2026. Interface labels and plan availability may change. The example character and station story are original instructional materials. This guide does not promise identical generations from a reference image; it documents a practical workflow for controlling a six-panel page and repairing individual results.